


Wait what? I can build that myself! 19/03/2016
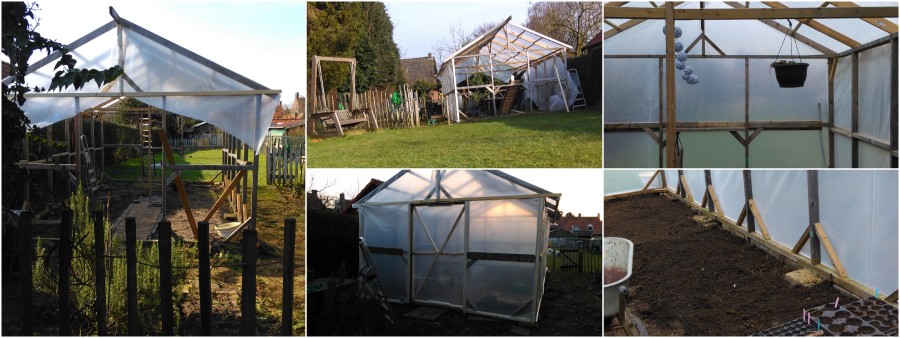
What do you do when you want a super big greenhouse in your garden but you cannot afford to buy one? You take out your toolbelt and you build your own! Well, that's what we did over the past year. So this season I can really get wild and grow lots of tomatoes, cucumbers and maybe even a melon in our Dutch rainy climate. You can see the basic steps we took in the image slider on the top of this page. But I will break it down into steps and tell you how we built our own Greenhouse Paradise. Sorry if I do not always use the right terms, I am Dutch after all... We used wood and foil mainly, because these materials are relatively affordable and easy to find. Where possible we used second-hand or reclaimed wood and tiles. The foil was ordered from a specialised webshop and it is normally used for tunnel greenhouses. We expect the foil to last for about 5 years, depending on the weather conditions. In the Netherlands it is unlikely that the sun will cause any problems but the wind might eventually get to it.
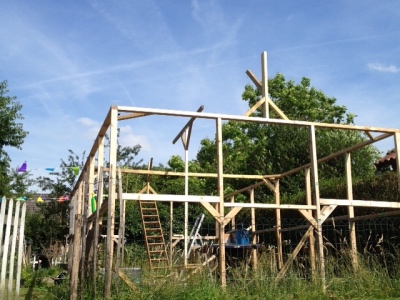
Of course the first thing to do is to create a design based upon the size of the greenhouse you intend to build. Also you need to determine the best location for it. I choose to build the greenhouse on the shadow side of the vegetable garden, because I think it will be hot enough and otherwise I will not have any direct sunlight in the other part of my garden. Also I often see that people use white paint to keep the sun out of the greenhouse because the direct sunlight can be too bright and burn the plants. We will have to find out if the location is suitable to grow the things I want. The size of the greenhouse is in our case based upon the size of the beams we bought. The lenght of the beams is 2,4 metres so we have made the long sides 7,2 and the short sides 3,6. Since 2,4 is a common lenght for beams here this was an easy way to cut down on the sawing needed. The hight of the walls is 2,1 meters and the ridge of the roof is about 3 meters high. I wanted to make the greenhouse high enough so we could easily stand on the sides and to make enough room for plants such as tomatoes and cucumbers that tend to grow quite high. And yes it is a super big greenhouse. But looking at the Dutch climate I would say that a greenhouse can never be too big!
Step 1: solid foundation
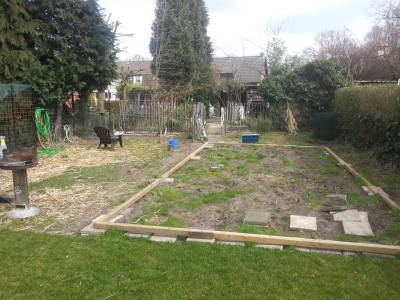
To create a solid foundation we used about 10 beams of about 80cm deep. They are put into the ground in metal pins to keep them from rotting. On top of that the first layer was placed as you can see on the picture here. We used screws (a lot!) to put all the wood together. Finally we also used some old tiles for extra support.
Step 2: putting up the walls
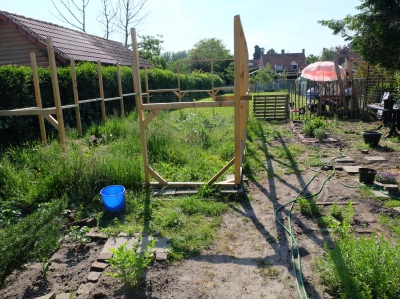
On each corner and then every 1,25m we put a beam to form the wall. Place the side beams with at least two people to keep them from falling and getting damaged. We added horizontal support and also diagonal support at the bottom at each corner to make the walls sturdy. Lots of wood and sawing involved! Since wood is not always super straight it is a good idea to keep measuring before you start sawing. Oh and do not forget to keep in mind where you want to place your door.
Step 3: Finishing the walls
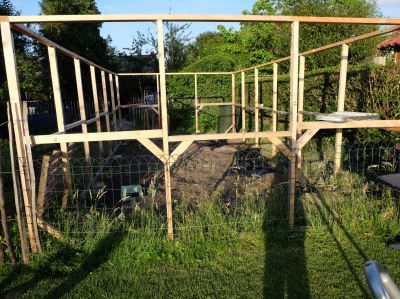
As a final touch we added some more diagonal support and a final top layer onto the walls. This already made the greenhouse much more stable. We also had to add a little fence to make sure our two dogs cannot run through the whole garden and dig holes everywhere. Yay! Drink a beer, the walls are up!
Step 4: First steps for the roof
In the middle of the greenhouse we added another beam to stabilize it further. Also we added the support beams for the ridge of the roof. We needed a very high ladded to get this part done and we started to worry a little bit about assembling the roof. Also it kind of started to feel like maybe we overdid it a little bit...
Step 5: The roof
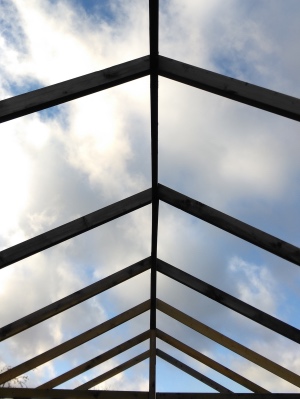
Since our roof is overhanging the walls, we had to do some youtube research on how to calculate the angle to cut out of the wood to make it fit. Eventually we use a trick with a triangle ruler that worked like a charm! Still we took the time to measure each beam individually to make sure it would fit. Then at the lower end of the roof we made a final closing beam so that we would have something to attach the foil to. Time for another beer! Oh wait, the roof also needed horizontal support we created two support beams again in each 'gap'. Again, we measured them all seperately because in most cases there was even a difference in length between the upper and lower support beam. The reason we choose to have an overhanging roof is that we have less change of leakage.
Step 6: The roof - finished
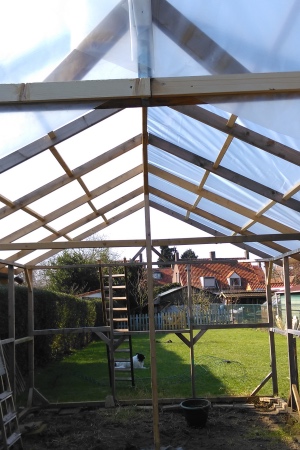
On this picture you can clearly see the final result of the roof with all the horizontal support beams. Now that the wooden structure was done, it was time to put the foil onto the greenhouse! Super exciting! We started with the roof. We used an 8x8m piece of foil to cover the roof. We each took one side and using two ladders we managed to pull it over the roof. The husband had to do some dangerous climbing too. Who said gardening was a dull hobby? Since we managed to ruin our stapler we used only wood and screws to attach the foil onto the greenhouse. We later discovered that clamps are a great help in getting the foil nice and tight. Expecially if you are working on this by yourself.
Step 7: Covering the walls
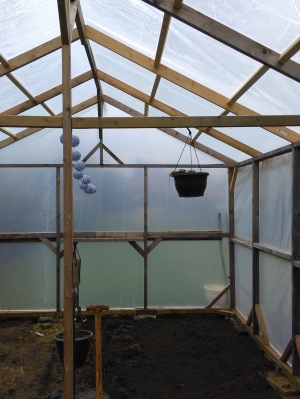
Using clamps, lots of patience, wood and screws, we covered all the walls with foil. Eventually we also added more wood on the outside to make sure the foil would not be flapping in the wind. We used outdoor wood and RVS screws for this. So now the only thing left was to make a door! The greenhouse was already quite comfortable inside because of the lack of wind. But of course the missing door was still taking away a lot of the warmth. Do you see the cute lampions? They are from IKEA and they work on solar power. I have mounted the solar panel onto the ridge of the roof. It looks so romantic! You can also see I already did some work on preparing the soil for the new season. I love that clean look of freshly turned soil.
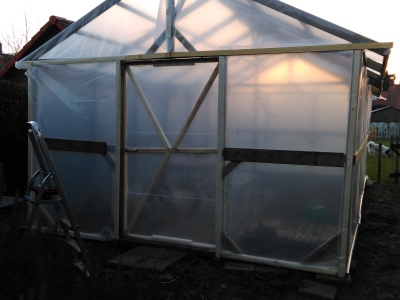
Step 8: The door
Since I already had some recent experience in making a sliding door, I choose to make one for the greenhouse as well. I also like the idea that you can easily open a sliding door as far as needed for some fresh air in the greenhouse. As you might notice I did run out of wood in the end. Or ehm, this was a creative design decision haha. It was more work than I anticipated because of all the foil that needed to be attached. Also I was kind of done with wood and foil I must admit. But finally when everything was done and the door was in place, finally we could say: the greenhouse is finished! On the outside that is. Because on the inside the work continues.